Mobile App Development Process
As trite as it sounds, all great apps began as ideas. If you don’t have an app idea, the best place to start is to train yourself to always think of things in terms of problems and potential solutions. You want your brain to instinctively ask “Why do we do things this way?” or “Is there a better way to solve this problem?” If you can identify a problem or market inefficiency, you are half way to your idea! : moPharma
Each day thousands of mobile apps are published to the Google Play and Apple App Stores. Some of these mobile apps are games, others are social networks, and many are ecommerce apps. All of these android apps, if professionally built, should follow a similar mobile app development process. At moPharma, we have built over 100 web and mobile apps and in this article I will outline the strategy, design, and development processes we follow.
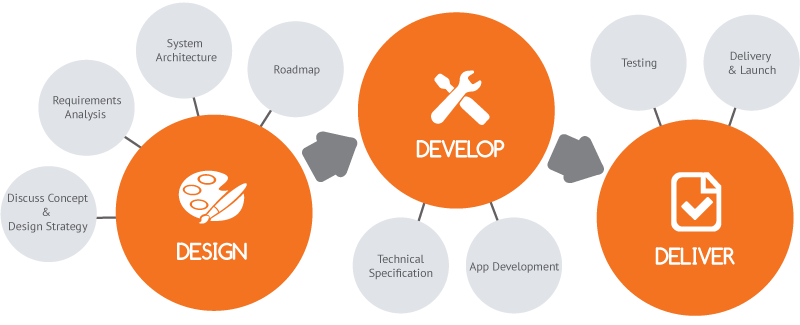
Each android app is different and our methodologies are always evolving, but this is a fairly standard process when developing mobile apps. This mobile app development process typically includes idea, strategy, design, development, deployment, and post-launch phases.

- Idea
- Strategy
- Competition
- Number of installs - See if anyone is using these apps.
- Ratings and reviews - See if people like these apps and what they like/dislike about them.
- Company history - See how these apps have changed over time and what sort of challenges they faced along the way. Try to see what they did to grow their user base.
- Monetization
- Marketing
- Road Map (MVP)
- User-Experience Design
- Information Architecture
- Wireframes
- Workflows
- Click-through models
- User-Interface Design
- Style guides
- Rendered designs
- Rendered Click-through models
- Design-to-Development Handoff
- High-level Technical Design (Tech Stack)
- Front-end (the mobile app)
Platform-specific Native - Apps built with this approach are written separately for each mobile platform. Code can’t be reused between Android and iOS, but these apps can be fully optimized for each platform. The UI can look entirely native (so it will fit in with the OS) and the app should work fluidly. This is often the most expensive approach, but is very tried and tested.
Cross-platform Native - Apps built with this approach have some (or entirely shared) code, but still run natively. Common technologies used for this are React Native, Xamarin, and Native Script. This is a nice middle ground between the various approaches in that it is more cost-effective, but can still be optimized and styled for each platform.
Hybrid - Hybrid apps are built using web technologies (HTML, CSS, Javascript) and are installed via a native wrapper. This can be done using technologies such as Cordova, Phone Gap, and Ionic. This option can be the cheapest, but also presents some very real difficulties.
- Back-end (Web API & Server)
Language - There are dozens of languages that can be used to build your API. Common languages used are Java, C#, Go-lang, javascript, PHP, and Python. Most languages also have numerous frameworks that can be utilized.
Database - There are two main types of modern databases. SQL and noSQL. SQL is more traditional and the best choice in almost all cases. Common SQL implementations include MSSQL, MYSQL, and PostgreSQL. In addition to selecting a database engine, you have to design your particular database schema. Having reliable and well organized data is crucial to your long term success. So, make sure this is well thought out.
Hosting Environment (Infrastructure) - In this step you need to decide where and how your API and database will be hosted. Decisions made here will help determine the hosting costs, scalability, performance, and reliability of your application. Common hosting providers include Amazon AWS and Rackspace. Beyond picking a provider, you need to plan how your system will scale as your user base grows. Cloud-based solutions allow you to pay for resources as a utility and scale up and down as needed. They also help with database backups, server uptime, and operating system updates.
- Development & Iteration
- Planning
- Development
- Testing
Functional Testing - Testing to ensure the feature works as described in the requirements. Usually, a QA team will have a test plan with a list of actions and the desired app behavior.
Usability Testing - Testing to ensure the feature is user-friendly and is as intuitive as possible. Often it is helpful to bring in new testers for a “first-use” experience during this step.
Performance Testing - Your app might work perfectly, but if it takes 20 seconds to display a simple list, nobody is going to use it. Performance testing is typically more important in later sprints, but keep an eye on the app’s responsiveness as you move along.
Fit and Finish Testing - Just because the design phase is complete past, doesn't mean you can lock your designers in a closet. Designers should review each feature and ensure that their vision was implemented as described in the design. This is another reason why having one agency for both design and development is so beneficial.
Regression Testing - Remember that one feature from the previous sprint? Don’t assume it still works, just because you tested it last month. Good QA teams will have a list of tests to perform at the end of each sprint, which will include tests from previous sprints.
Device-Specific Testing - There are tens of thousands of device and operating system combinations in the world. When testing, make sure you try out your app on numerous screen sizes and OS versions. There are tools that can help automate this, such as Google’s Firebase, but always test the app on at least a handful of physical devices.
User Acceptance Testing - This is testing performed by either the app owner or future app users. Remember who you are building this app for and get their feedback throughout the process. If a feature passes all the above tests, but fails this one, what use is it?
- Review
- Extended Review
- Focus Groups
- Beta Testing
- Refinement
- Deployment
- Web API (Server)
- App Stores
- Monitoring
- Crashes
- Analytics
- Performance
- App Store Management
The next thing to do is understand why this problem exists and think about why nobody else has made an app to solve this problem previously. Talk to others with this problem. Immerse yourself in the problem space as much as possible. Once you have a complete grasp of the problem, begin to evaluate how a mobile app could solve the problem.
This is where having some understanding of what mobile apps can do is extremely valuable. We are frequently asked, “Is this even possible?” Fortunately, the answer is often yes, but it is imperative that this answer is sound. You are about to invest a considerable amount of time and money into an app, now is the time to challenge your idea’s validity and viability.
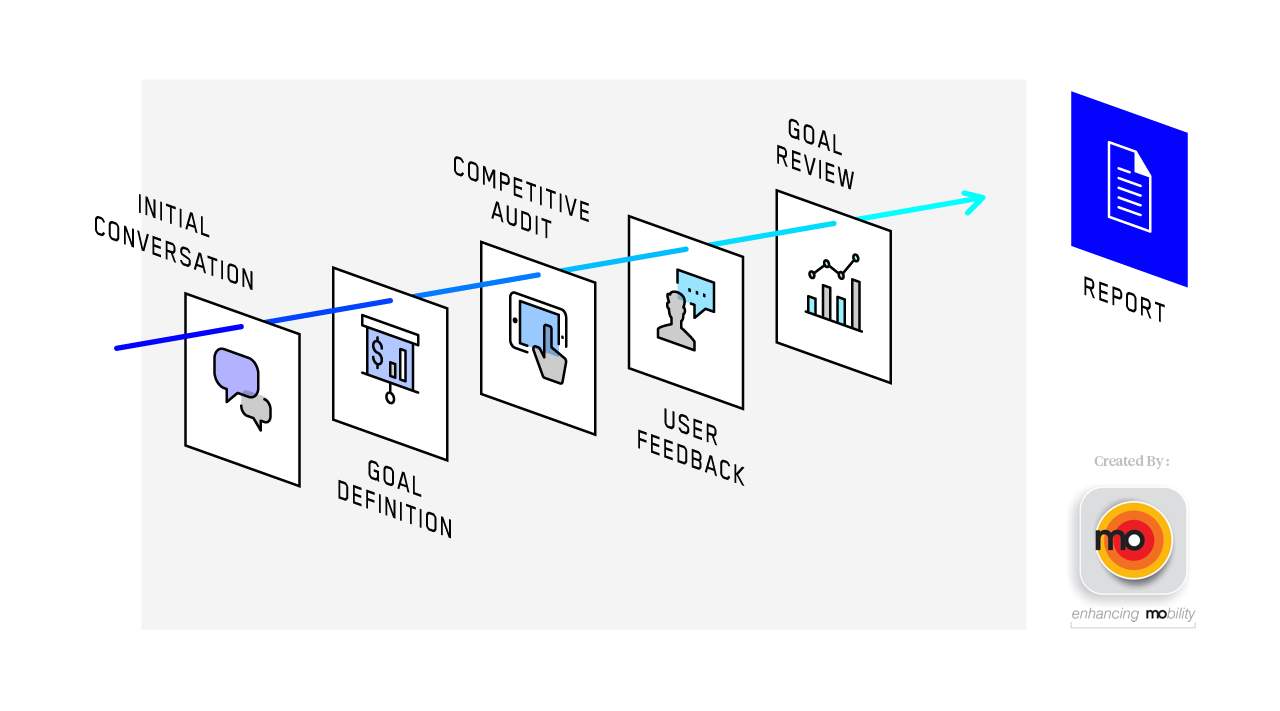
Tips: Mobile App Development Process - Strategy Diagram
Once you have an idea, you need to plan for your app’s success. One of the best places to start is by identifying your competition. See if any other apps serve a similar purpose and look for the following:
There are two main goals of this process. First, learn as much as you can for free. Making mistakes is time consuming, frustrating, and expensive. Often, you have to try a few approaches before getting it right. Why not save yourself a few iterations, by learning lessons from your competitors? The second is to understand how hard it will be to compete in the marketplace. Are people hungry for a new solution? Is there some niche not being filled by the existing options? Understand what gaps exist and tailor your solution to meet them. If your idea is completely new, find other “first to market” apps and study how they educated consumers about their new product.
Unless you just enjoy building apps for their own sake, you are probably hoping to make money on your mobile app. There are several methods of monetization that could work, including: in-app purchases, subscription payments, premium features, ad-revenue, selling user data, and traditional paid apps. To determine which is best for your app, look to see what the market expects to pay and how they expect to pay for similar services. You also need to consider at what point you begin monetizing your app. Far too many apps (particularly startups) skip this step and have a hard time later turning a profit.
This step in the mobile app development process is all about identifying the biggest challenges you will face when marketing your app. Assuming you have a reliable app development and app design team, your biggest hurdles will likely be driving app adoption. There are thousands of beautiful and quite useful apps on the app stores that simply go unused. At this point you need to understand what your marketing budget and approach will be. In some cases (like internal-use apps or B2B apps) you might not even need marketing.
The final stage of the strategy process is defining your app’s roadmap. The goal of this process is to understand what your app could one day become and what it needs to be successful on day one. This day one version is often called your Minimum Viable Product (MVP). During this process, it can be helpful to write on a whiteboard all of the things you want your app to do. Then begin ranking these items by priority. Consider what your app's core functionality will be, what is needed to gain users, and what can be added later. If there are some features you think users might want, they are likely great candidates for later versions. As you gain users with your MVP, you can solicit feedback on what additional features are desired. App monitoring (covered later in this article) can also assist in this process.
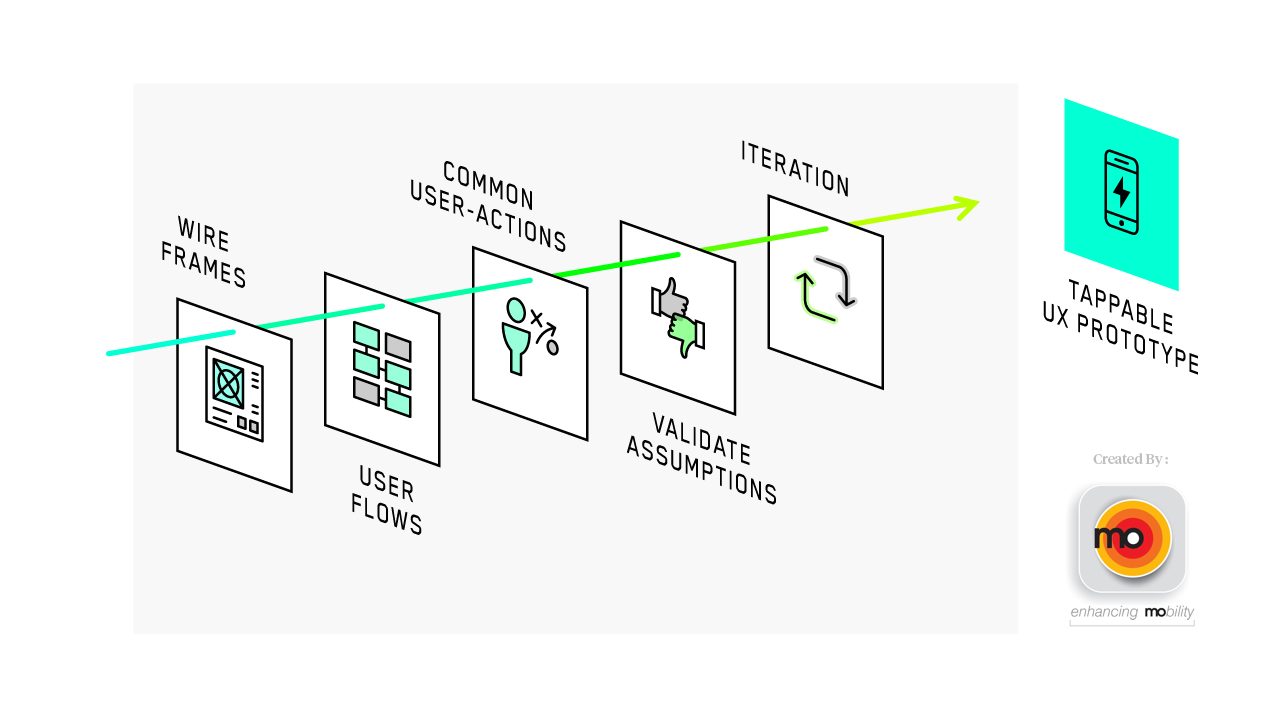
Tips: Mobile App Process - UX Design Diagram
Information architecture is the process in which you decide what data and functionality needs to be presented within your app and how that data and functionality is organized. Typically, we begin this process by writing down a list of features we want the app to perform and a list of what needs to be displayed somewhere in the app. These are the basic building blocks with which we will build the wireframes.
Tools we use: Whiteboards and Pencil & paper
Next, we begin creating screens and assigning each functions and data. It is ok if somethings live in multiple places, but you need to make sure each item has a home. This process often takes place on whiteboards or paper initially. You want to make changes here, rather than later in the process, because it is much cheaper to erase some marks than to rewrite code. Once you have several screens drawn up, begin considering your app’s workflows.
Tools we use: Whiteboards, Pencil & paper, balsamiq, and Sketch
Workflows are the pathways users can travel within your app. Consider each of the things you want your users to be able to do and see how many clicks are needed to complete that action. Make sure each click is intuitive. If something takes a few clicks to accomplish, that might be fine, but it should not take a few clicks to perform common tasks. As you find problems with your workflows, update your wireframes and try again. Remember to run through all of your features in each iteration, just to make sure you did not increase the difficulty of one action in an attempt to improve another.
Tools we use: Whiteboards, Pencil & paper, Invision
Click-through models help you test your wireframes and workflows. They are basically a way to experience your wireframes on a phone for more realistic testing. For example, our clients simply receive a link, which when opened on their phone allows them to click through the wireframe. Although the app has no functionality at this point, they can click on each page in the app and begin testing the app’s navigation. As you find issues in this step, make changes with your wireframes and iterate until you are satisfied.
Tools we use: Invision
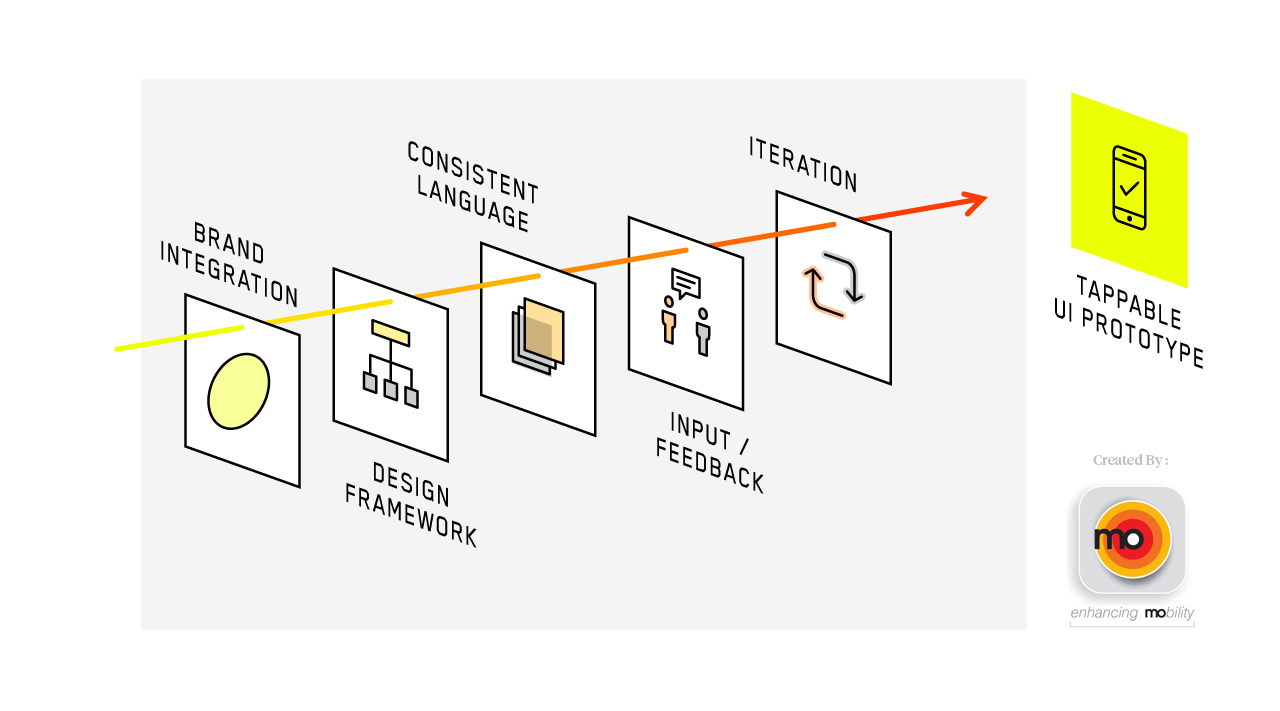
Tips: Mobile App Development Process - UI Design Diagram
Style guides are basically the building blocks of your app’s design. Having a sound style guide will help tremendously with your app’s usability. You don’t want your call to action button on one screen to be at the bottom and blue, but green and in the header on another screen. By having a consistent design language, users are more likely to be comfortable within your app.
There is a lot that goes into determining an app’s style guide. You need to consider who you are and who your customers will be. Is your app going to be used at night? Then maybe a dark theme will work best, as to not blind your users. Will it be used mostly by busy employees? Try to keep clutter to a minimum and get your main point across. An experienced designer or design team has a wide range of output and can deliver an app that is a great fit for you and your customers. The output of this phase is a set of colors, fonts, and widgets (buttons, forms, labels, etc.) that will be drawn from in the design of your app.
Rendered design is the process of taking your wireframes and replacing the grayscale elements with elements from your style guide. There should be a rendered screen for each wireframe screen. Try to stay true to your style guide in this process, but you don’t have to be dogmatic about it. If you find yourself wanting a new or changed style, feel free to update or amend your style guides. Just make sure your design is consistent when this stage is complete.
Tools we use: Whiteboards, Pencil & paper, and Sketch
Once you have all your screens rendered, return to your click-through model application and test your app again. This is the step in the mobile app development process where you really want to take your time. Although a considerable amount of effort has already gone into the app, after this point changes can become increasingly costly. Think of this as reviewing a floor plan before your home’s concrete is poured. Fortunately, mobile app development is a bit more adaptive than construction, but thinking of it in these terms can be the most cost-effective.
Tools we use: Invision
After having put in so much effort into the form and function of your app, it is imperative that this vision is properly realized by your development team. It always amazes me how often this step in the mobile app development process goes poorly. Perhaps this is due to many organizations and agencies only providing design or development services or the sometimes combative relationship between designers and mobile app developers. Whatever the reason, I highly recommend finding a team that can provide both design and development services and can properly handle this step in the process.
Part of what helps ensure a smooth transition and exact implementation is the proper use of the available tools. We like using an application called Zeplin, which helps developers quickly grab style guides for the design. But, this is not foolproof. Zeppelin is a great tool, but sometimes its guides are not exact or not the best implementation (it can use explicit dimensions, rather than dynamic ones for example). In those situations, it is immensely beneficial if your developers can also use design applications (such as Sketch or Photoshop). The important thing here is that your team does not simply best guess at dimensions, hex values (colors), and positioning. Your design team put in tremendous effort to ensure things were properly aligned and positioned. Your development team’s goal should always be a pixel-perfect implementation.
Tools we use: Zeplin
There are numerous approaches, technologies, and programing languages that can be used to build a mobile app. Each with its own strengths and shortcomings. Some might be cheaper to use, but are less performant, whereas others might take longer to implement and be overkill. The worst possibility is building on a dying or unreliable technology stack. If you make this mistake, you might have to rebuild your app or pay a premium for developers moving forward. That is why having a trusted development partner that is seasoned in making these decisions is vital in this process.
For front-end development, there are basically 3 approaches. They are platform-specific native, cross-platform native, and hybrid. Here is a brief overview of each approach and some articles that delve into each with greater details.
The server is responsible for much of your app’s performance and scalability. The technologies used here are similar to those used to power web-based applications. Here are a few things you have to decide before writing code:
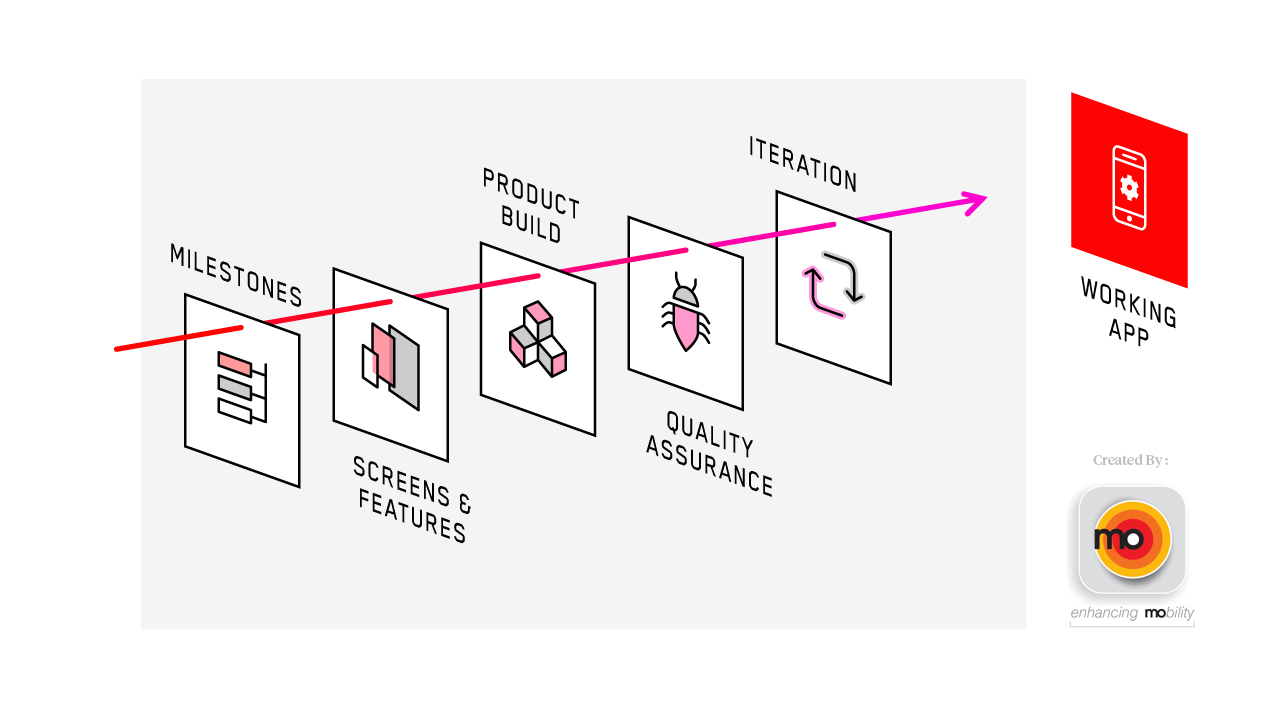
Tips: Mobile App Process - Development Diagram
Sound mobile app development is an iterative process. You have likely heard the term “sprints” or “agile methodology”. This basically means that you break up all development work into smaller milestones and build your app in a series of cycles. Each cycle will include planning, development, testing, and review. There are entire books written on this process, so this article will just provide a brief overview of each step. If your company elects to use another process, these steps will be quite similar, but the order and length of each might vary.
The planning phase of a sprint involves dividing up the list of tasks to be implemented during the current iteration. Each task needs clearly defined requirements. Once these requirements are understood by developers, they will often estimate the time needed to complete each task, so that the tasks can be evenly distributed to ensure a balanced workload during the sprint.
Developers also begin planning their approach to solving their assigned problems during this phase. Skilled software developers find ways to intelligently reuse code throughout an application. This is especially important for implementing styles and shared functionality. If a design needs to be changed (believe me, something will change), you don’t want to have to go and update code in numerous places. Instead, well designed software can be changed in select places to make these sorts of sweeping changes.
During the development phase your development team will begin implementing the styles and functionality of your app. As they are completed, they are assigned back to a project manager or QA tester for review. Good project managers are able to fully optimize developer workloads during this process by properly redistributing assignments throughout the sprint.
It is important that your development team fully understand the goals of the application as a whole and for the specific feature they are working on. Nobody is more in-tune with that particular feature than the assigned developer. They should understand the intent of the requirements. If something starts to not make sense, it is often developers who will be the first to let you know.
During development, we use a platform called Hockey App. It allows us to privately and securely distribute the in-development version of the app to testers, clients, and other developers. Hockey automatically notifies users of new builds (so everyone is testing the latest & greatest), provides crash reporting, and can ensure only approved testers have access to your app. It is a great way to keep everyone up to speed on progress. During development, we try to update Hockey once or twice a week.
Most testing should be performed by non-developers or at least people who are not your app’s primary developer. This will help ensure a more genuine testing experience. There are several types of testing that should occur during each sprint. These typically include the following:
As problems are discovered in this phase, reassign tasks back to developers so that the problems can be resolved and the issues closed out. Once testing has been completed and each task is done, move on to review.
At the end of each sprint talk with each of the stakeholders and determine how the sprint went. If there were difficulties, try to eliminate similar issues from future sprints. If things went well in one area, try to apply them elsewhere. No two projects are the exact same and everyone should always be advancing in their roles, so aim to improve, while you iterate. Once review is complete, begin again with the planning phase and repeat this process until the app is done!
At this point your app should be fully testable and feature complete (at least for the MVP). Before you spend a sizable amount of time and money on marketing, take the time to test your app with a sample of your potential users. There are two main ways to go about this.
Focus groups involve conducting an interview with a tester or group of testers who have never seen the app before and conduct an interview. You want to understand who these testers are, how they learn about new apps, and if they use similar apps already. Try to get some background info out of them before even getting into your product. Next, let your testers begin using your app. They should not be coached during this process. Instead, let them use the app as if they had just found it in the app store. See how they use the app, and look for common frustrations. After they are done using the app, get their feedback. Remember to not be too strongly guided by any one tester, but combine feedback and make intelligent decisions using all available feedback.
In addition to, or instead of focus groups, you can do a beta launch of your app. Beta tests involve getting a group of testers to user your app in the real world. They use the app just as if it had launched, but in much smaller numbers. Often these beta testers will be power users, early adopters, and possibly your best customers. Make sure they feel valued and respected. Give them ample opportunities to provide feedback and let them know when and how you are changing the app. Also, beta testing is a great time to see how your app performs on various devices, locations, operating systems, and network conditions. It is imperative that you have sound crash reporting for this step. It does you no good if something goes wrong, but is not discovered and diagnosed.
After these extended review periods, it is common to have a final development sprint to address any newly discovered issues. Continue beta testing during this process and ensure that your crash and issue reports are declining. Once you have the all-clear from your testers, it is time to begin preparing for deployment.
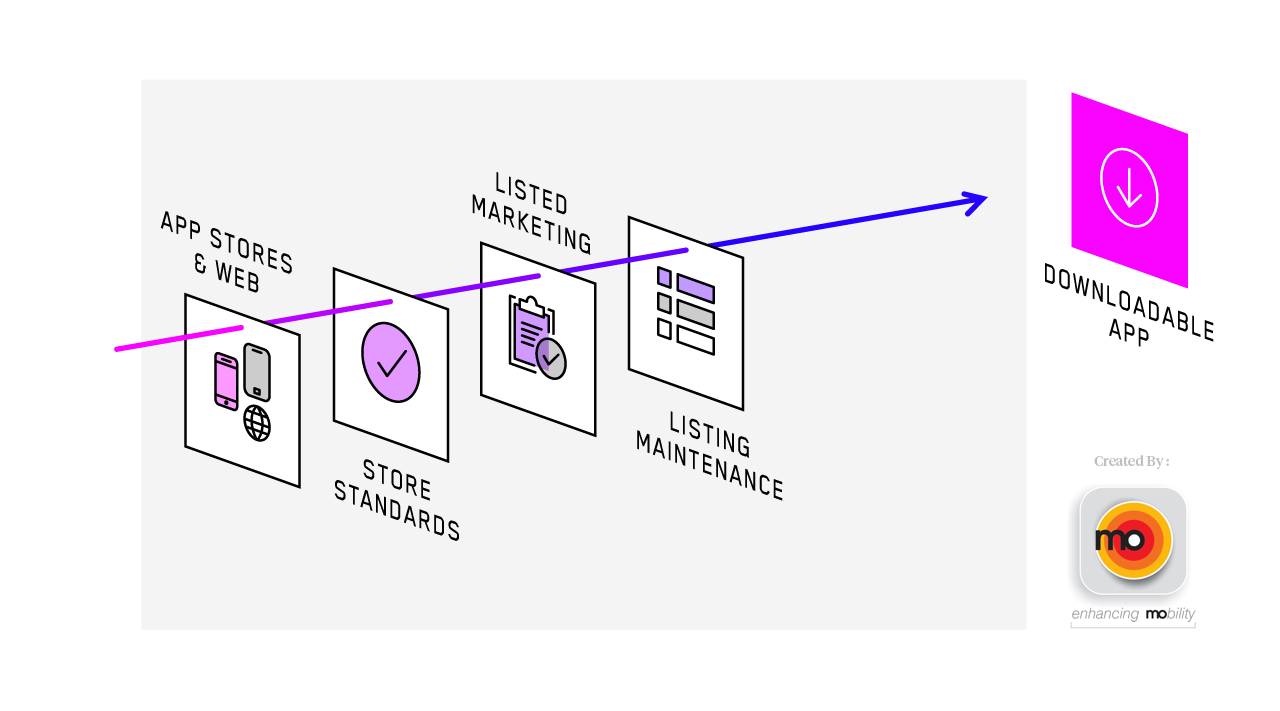
Tips: Mobile App Process - Deployment Diagram
There are two main components to deploying your mobile app into the world. The first involves deploying your web server (API) into a production environment that is scalable. The second is deploying your app to the Google Play Store and Apple App Store.
Most mobile apps require a server back-end to function. These web servers are responsible for transferring data to and from the app. If your server is overloaded or stops working, the app will stop working. Properly configured servers are scalable to meet your current and potential user base, while not being needlessly expensive. This is where the “cloud” comes in. If your server is deployed to a scalable environment (Amazon Web Services, RackSpace, etc.), then it should be able to better handle spikes in traffic. It is not terribly difficult to scale for most mobile apps, but you want to ensure your team knows what they are doing or your app could fall apart, just when it gets popular.
Submitting your apps to the app stores is a moderately involved process. You need to make sure your apps are properly configured for release, fill out several forms for each store, submit screenshots and marketing materials, and write a description. Additionally, Apple manually reviews all apps submitted to their app store. It is possible they will request you make changes to your app to better comply with their regulations. Often, you can discuss these changes with Apple and get them to accept your app as-is. Other times, you might have to make changes to be granted entrance. Once your app is submitted, it will be live in Google later that day and in Apple within a few days, assuming everything goes smoothly.

Tips: Mobile App Process - Monitoring Diagram
It would be incredibly naive to think that the mobile app development process ends when the app is shipped. Go look at any even moderately popular apps and you will see a long history of app updates. These updates include fixes, performance improvements, changes, and new features. Thorough monitoring is essential to best understand what sort of updates are needed. Here are a few things you should be monitoring.
There are numerous libraries that can be used to reliably track app crashes. These libraries include information about what the user was doing, what device they were on, and plenty of technical info that is crucial for your development team in resolving the problem. Apps can be configured to send an email/text/alert when crashes occur. These crashes can be viewed and triaged accordingly.
Tools we use: Sentry and HockeyApp
Modern app analytics systems are are treasure trove of information. They can help you understand who is using your apps (age, gender, location, language, etc.) and how they are using it (time of day, time spent in app, screens viewed in app, etc.). Some even allow you to view heat maps of your app, so you know what buttons on each screen are clicked most often. These systems provide an invaluable glimpse into how your app is being used. Use this information to best understand where to invest future efforts. Don’t build onto portions of the app that are seldom utilized, but invest where there is action and the largest potential for growth.
Tools we use: Facebook Analytics, Apptentive, Google Analytics, and Appsee
One vital metric not covered by the previous two monitoring categories is your apps technical performance, i.e. how quickly it works. Any system we deploy has extensive performance monitoring in place. We are able to track how many times an action occurred and how long that action took. We use this to find areas ripe for optimization. We also put alerts in place to let us know if a particular action is slower than expected, so we can quickly look to see if there are any issues. These performance tools typically have dash-boarding, reporting, and alerting functionality included.
Tools we use: Prometheus
App store ratings and reviews are extremely important, particularly for newer apps. Whenever a new review is left on your listing, make sure to engage the reviewer. Thank users who give you great reviews and try to assist those who were frustrated. I have seen hundreds of poor reviews changed to 5-stars just with a little customer service. Users don’t expect app developers and owners to provide a hands-on level of service and that help goes a long way in boosting your online reputation.
Further Iteration and Improvement
The purpose of all this monitoring is to know what you need to do next. Most apps are never really done. There are always new features that can be added and things that can be improved upon. It would be incredibly wasteful to blindly build on your app. Use the information you have received from your users and your monitoring platforms. Then repeat parts of this mobile app development process (don’t worry, many steps are much easier each after the first pass). Continue to improve your app, your conversion rates, your install base, and of course your revenue. Mobile apps are fluid. Take advantage of that by continuing to grow and improve.
Conclusion
The mobile app development process might seem overwhelming and involved. There are a lot of steps and difficult decision making is required along the way. But, it is an extremely rewarding process and can be quite lucrative. Also, there might be some temptation to skips steps in this process, but this guide is built upon years of experience working with app owners that chose to skip certain steps.

KYC Document Collection (Sample App) by moPharma
If you are looking to build your next (or first) mobile app and need help with one or more of these steps, you’re in luck! The moPharma Group welcomes app owners at any stage in this process. Whether you are a startup or Fortune 50 company, we have the team and knowledge needed to deliver a fantastic mobile app. Please don’t hesitate to write us today.
Mobile App Development Process
Educational Material by moPharma
Digital Marketing Agency
Discuss about post